For those, interessted in doing some really awsome things with things, I recommend having a closer look to Azure IoT Suite.
It is a kind of website, that enables you to get ready with IoT in minutes. Azure IoT Suite applicates all IoT capabillities of Azure Cloud. In form of web application, that IoT Suite offers, you can dive into world of IoT.
But let’s see how to start…
This guide shows, how to create an work with Azure ioT Suite.
And here are the prerequisits:
– Azure Subscription (use youre MSFS Account and register for a 90 day-free subscription)
– maybe some devices, if available (it’s not a must)
- First hook into https://www.azureiotsuite.com/ … register or sign in
- Next, you see the the following

- to proceed click on the tile with the big plus on it
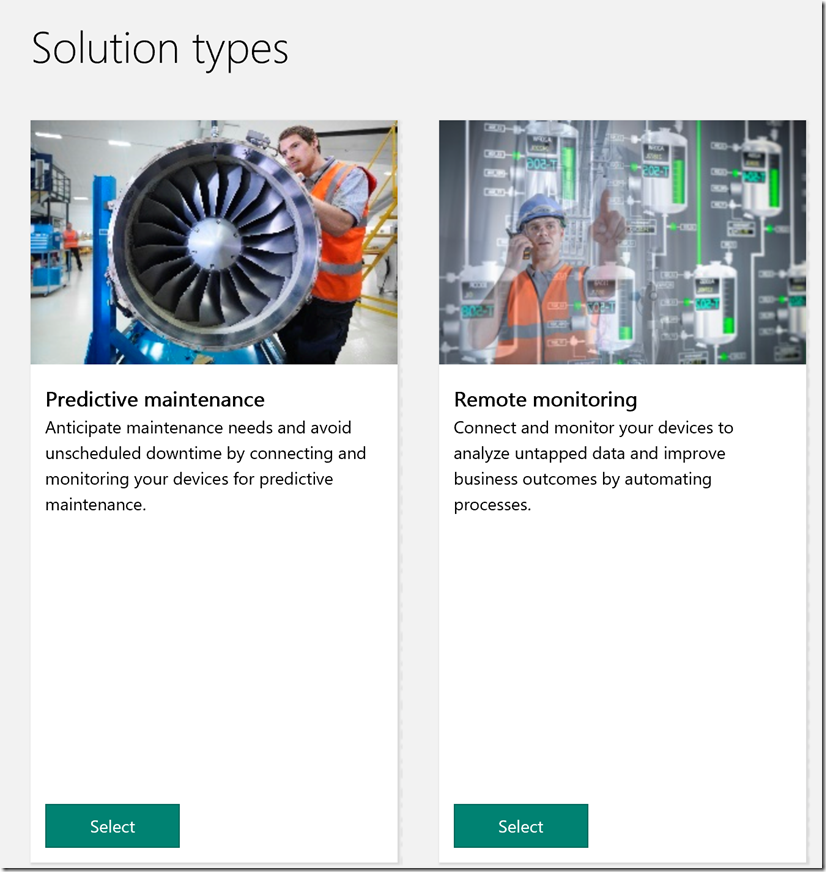
- As the next level shows, you have now two options to proceed
 here you can either select to get into a predictive maintenance solution or into remote monitoringWhat are the differences? The “predictive maintenance” concept is based on evaluting data with machine learning, to predict issues of monitored systems. The “remote monitoring” solution contains of dashboards and monitoring tools, that also enables specific device management.
First, I would recommend starting with “remote monitoring”, because it is easier to go for a start. Machine learning is, made really simple with Azure ML, but as topic, it is still a complex one. - So click on “Remote monitoring” and enter all necessary details

- After you clicked on “Create solution”, Azure IoT Suite starts the deployment process.
What it really does in background is simply gathering the sources for the WebApps and –Jobs from GitHub (https://github.com/Azure/azure-iot-remote-monitoring) and starting deployment scripts from there.
So, if you like, you can go directly to GitHub, grab the sources and start some powershell scripts/ batch-files.
Here is a hint: If you check the picture in step 5, you can see the provisioned components for the IoT Suite App.
Look carefully to the SKUs (stock keeping units). IoT Hub is set to S2, an App Service with P1, another with S1 and also storage with Standard-GRS.
Theses SKUs aren’t that cheap. So after creating the “remote monitoring”-solution, you should go to the different services and lower the units.


- Now Azure is creating your solution
- Lastly, you have to accept some authentication and access requests. On successfull clicking
 , you can launch the app:


Lowering prices
…and here is how!
1. First take IoT Hub. Go to http://www.portal.azure.com locate your Resource-Group (in my case BlogTT2) and click on IoTHub (“BlogTT2xxx”)

 don’t forget to save
2. next get to the App services and switch to a lower SKU like following example shows

3. also check storage. This is a big cost, so reduce it to a LRS SKU like in the following picture

4. With these tweaks you can reduce the cost from over 100$/month to round about 50$
…Hope you got everything right. Play around and get comfortable with IoT 🙂